Wednesday, July 4, 2012

Fertilizer, is it just bullshit?


So we are are hitting that magical ear mark of the growing season, the 4th of July. I have been getting a lot of questions about fertilizer. When, what, how and why. Let's start at the starting point, the point when you have pulled all your plants in the fall. You will remove a bunch of the leftover foliage and this is a great time to do some green composting. Green composting you ask? Green composting is planting ground cover that is high in nitrogen and can be tilled under to provide great growing medium the following year. Some people choose to plant ground cover in between rows or in the furrows through out the year, I like to do it in the fall allowing the ground cover to die off before seeding. Another option is in the fall after you have pulled you carrots and the brussels sprouts have seen their first frost, you can add compost from your compost pile or bring it in from a commercial outfit. Either way bringing in composted materials in the fall is a great way to get ready for the following season. 

   Now lets talk about spring. You can add compost or my favorite, composted manure to the garden tilling. By adding composted materials you are ensuring that your plants will have the nutrients that they need to grow up big and strong. Plant location is another important thing to look at. Some plants like tomatoes and corn use up a lot of the soil's nitrogen. While others like beans and peas tend to enrich the soil with nitrogen producing bacteria. So plant the tomatoes where the beans were last year and plant the beans where the tomatoes were. Hows your sun? Without the required amount of sun all the fertilizer in the world wont do you any good. So be sure to plant the plants that need the most sun in the sunniest spots. 

  Okay so its the beginning of the growing season, you have all the plants in the ground when should I use that miracle growth stuff? Never! Plants do great with organically produced nutrients, you don't need any witch's brew. I like to use fish emulsion and composted chicken poop (be sure you read the directions on this one). I use the chicken poop before it rains about a month after my garden has been planted and then once a month after that. On a quick note, I have found that our dog Roscoe really enjoys the chicken poop too, so if you have a dog be sure its not stealing food out of your plants mouth. I use fish emulsion after I have watered, about every 7-10 days. I find that it is really hard to burn your plants with the fish emulsion, the chicken poop on the other hand can be very easy to burn the plants. I use all these fertilizers according to the directions on the package. It may take a little experimenting before you find the right combination, but that's part of the fun. One final note, record keeping can be very helpful in determining you what's working and what's not. 

Happy Growing
Friday, April 6, 2012

Get the Dirt on Your Dirt

  With spring arriving early in Minnesota most people are trying to get a jump on their gardens.  I like to remind people we still live in Minnesota and anything can happen.  Do I practice what I preach? Nope! I have spinach, lettuce, beans, and some peas in the soil.  I won't be putting out any peppers or tomatoes quite yet.  The soil temperature is still a little to low for my tastes.  Speaking of soil, when is the last time you had your tested?

  I feel that soil testing could be one of the most important parts of having a successful garden.  I like to work the ground beneath my feet, I feel more connected to the land this way. But to insure that what I am growing for the people I love I believe that I owe it to them to get the dirt on my dirt.  How do I get my soil tested one might ask? I live in Minneapolis and here the city provides free testing for lead.  If you live out side the city of Minneapolis check with your local government to see what they offer.  For a more in depth look at what you have in your yard, the University of Minnesota Soil Testing Laboratory is one of the best places to start.  The U will test the soil for phosphorus, potassium, pH – lime requirement, total organic matter, and estimated texture all for $15. For and additional $5 they will test for excessive salts (soluble salts) and for only $15 more you can have it tested for lead (requires separate sample). They offer a simple to use submission form and will make recommendations based on your test results.

Another great resource for, not only soil concerns but all your gardening needs, is you local University of Minnesota Extension office Home of the Master Gardener program, Extension provides a mass of resources, tips and tricks, and classes for the average person. It's a great link for the gardener to the vast knowledge data base of solutions at the University of Minnesota.

If you have questions, you might not be the only one with that question, post it on our Facebook page or hit us up on Twitter or  feel free to email us at buchananstreetfarms@gmail.com We may not know the answer but we'll do our best to find out.

As always happy growing. Nothing builds a heart felt relationship like sharing food with the ones we love.

Mike Smieja and Roscoe

Thursday, March 29, 2012

Our Seed Germination Room

So we needed to start our seeds, a lot of seed, like 4500+ seeds.  How to do it one might ask.  First the problem of "bottom heat", heating the soil from below.  Like I said we're planting 4500+ seeds that's a lot of room to heat.  Our friend Dick Larsen came to our rescue.  Dick is the Chief Engineer, Receptionist, Assembly Foreman, and Mascot of The Vegetable Revolution (contact info at the end).  Along with a little help from my less than mechanical brain, we came up with, what we think was a great solution.   First off I must let you know that our mantra through out this process was "we don't want to spend much money" It was great walking through every home improvement store and hearing Dick say "Michael! We don't wanna spend a lot of money!" I grew to love the way Dick got gruff every time I wanted to spend a little of the money I didn't have. 


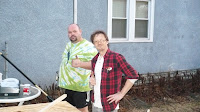
In case you were wondering what the two clowns that attempted this project here is a visual that you might want to forget.


First we started with a 4x8 sheet of plywood and cut it in half.

After we cut the sheet of plywood in half we framed in the outside edges with 2x2s. We did this with screws and a screw gun. 


After we had it all framed up we added the tubing for the hot water. 


We used 3/8" tubing, We started with 25 feet per table.  We later added 25 more feet for better heat disbursement.


We created a weaving pattern to move the heat around evenly.  We anchored that tubeing with standard electrical wire anchors.  We had to cut out an opening at the end to run the tubing out of once the cement had been placed in the table.


After construction we moved them into my basement where we had a special room set up.  When I say special I mean that we had 6 brand new buckets to place our tables on.


Next is our pump and heating units.


This is what we started with.  A 120v hot tub heater it was out of a hot tub that someone was getting rid of.  FREE!


We added the FREE pump that came along with the FREE heater. To come up with something that looks like ET.


To taper the large out flow out of the heater to our 3/8" tubes out friend Craig (whom we gave a hard time every time we went in to Ace on Central) helped us find a solution.  Some pipe caps with some 3/8" hose thingies tapped in to them.

Next it was time to put it together.


Once it was put together is was time to add the cement

Roscoe had to help too!

At this point w actually added 25 feed more of tubing to the tables but we were in such a hurry to get it done we took zero pictures.

Now the pictures stopped completely.  We hadn't really planned on blogging about this.  But we hooked everything up and ran the system and the hot tub heater stopped working.  Dick came to the rescue and built a small water heater with a thermostat.  We have been maintaining a consistant tempeture of around 85 degrees.  We started our seeds and they are on their way.


Dick Larsen is a local Minneapolis foodie and he is the future of sub-irrigated container gardening.  he can be reached on Facebook @ The Vegetable Revolution

You can contact Buchanan Street Farms of Mike Smieja at: Facebook or Twitter or Email